

| 일 | 월 | 화 | 수 | 목 | 금 | 토 |
|---|---|---|---|---|---|---|
| 1 | 2 | 3 | 4 | 5 | ||
| 6 | 7 | 8 | 9 | 10 | 11 | 12 |
| 13 | 14 | 15 | 16 | 17 | 18 | 19 |
| 20 | 21 | 22 | 23 | 24 | 25 | 26 |
| 27 | 28 | 29 | 30 |
- font book
- dispatchsource
- 영문 개인정보처리방침
- 서체관리자
- 단일 책임원칙
- 클로저의 캡슐화
- Protocol
- MKMapViewDelegate
- WeatherManager
- MKMapItem
- CLLocationManagerDelegate
- Xcode
- Timer
- 한국어 개인정보처리방침
- SwiftUI Boolean 값
- weatherKit
- RunningTimer
- Required Reason API
- UICollectionViewFlowLayout
- UIAlertAction
- App Store Connect
- Startign Assignments
- 러닝타이머
- 러닝기록앱
- swift
- CoreLocation
- addannotation
- xcode로 날씨앱 만들기
- AnyObject
- weak var
- Today
- Total
VesselWheel
5일치 3시간 단위 날씨예보 배열에 넣기(with OpenWeatherMap) (2/2) 본문
https://vesselwheel.tistory.com/187
5일치 3시간 단위 날씨예보 배열에 넣기(with OpenWeatherMap) (1/2)
https://vesselwheel.tistory.com/185 3시간 단위 5일치 OpenWeatherMap API를 활용한 데이터 호출 기존에 WeatherData를 활용한 현재 날씨 API는 위경도 혹은 도시지역의 현재 날씨 기준으로 실시간 기상예보이다. //
vesselwheel.tistory.com
이전 글을 참고하여, API call을 통해 가져온 데이터를 UI에서 사용하기 위해 배열에 넣는 데이터 가공을 하였다.
하지만, 날씨데이터를 가져오는 매소드 안에, 데이터를 배열에 넣는 데이터가공작업을 함께하니 코드가 길어지고 가독성이 떨어지는 문제가 있었다.
그리하여, WeatherManager 클래스의 performRequestForecast 매소드에서 데이터 가공 역할을 매소드화 하여 별도의 클래스에 담아주었다.
1. WeatherDataProcessor 클래스의 데이터 가공 역할을 하는 process 매소드
//
//  WeatherDataProcessor.swift
//  Weather777
//
//  Created by Jason Yang on 2/14/24.
//

import Foundation

class WeatherDataProcessor {
    func process(weatherData: WeatherData) -> [(cityname: String, time: String, weatherIcon: String, weatherdescription: String, temperature: Double, wind: String, humidity: Int, tempMin: Double, tempMax: Double, feelsLike: Double, rainfall: Double)] {
        // 날씨 데이터를 성공적으로 받아왔을 때
        var forecastData: [(cityname: String, time: String, weatherIcon: String, weatherdescription: String, temperature: Double, wind: String, humidity: Int, tempMin: Double, tempMax: Double, feelsLike: Double, rainfall: Double)] = []

        for list in weatherData.list {
            let cityname = weatherData.city.name
            let time = list.dtTxt
            let weatherIcon = list.weather.first?.icon ?? ""
            let weatherdescription = list.weather.first?.description ?? ""
            let temperature = Double(list.main.temp)
            let celsiusTemperature = temperature.toCelsius()
            let windSpeed = list.wind.speed
            let humidity = list.main.humidity
            let tempMin = Double(list.main.tempMin)
            let tempMax = Double(list.main.tempMax)
            let celsiustempMin = tempMin.toCelsius()
            let celsiustempMax = tempMax.toCelsius()
            let feelsLike = Double(list.main.feelsLike)
            let celsiusfeelsLike = feelsLike.toCelsius()
            let rainfall = list.rain?.the3H ?? 0.0


            let forecast = (cityname: cityname, time: time, weatherIcon: weatherIcon, weatherdescription: weatherdescription, temperature: celsiusTemperature, wind: "\(windSpeed) m/s", humidity: humidity, tempMin: celsiustempMin, tempMax: celsiustempMax, feelsLike: celsiusfeelsLike, rainfall: rainfall)
            forecastData.append(forecast)
        }


        return forecastData
    }
}
2. 상기 process 매소드를 활용하여 WeatherManager에서는 WeatherDataProcessor() 클래스의 매소드를 사용하기 위해,
let processor = WeatherDataProcessor()
let forecastData = processor.process(weatherData: weatherData)WeatherDataProcessor()를 processor로 인스턴스화(초기화)하고,
weatherData: weatherData를 파라미터로 주입 받아, process 매소드로 forecastData 배열에 넣어준다.
변경된 WeatherManager클래스의 getForecastWeather 매소드
public func getForecastWeather(latitude: Double, longitude: Double, completion: @escaping(Result<[(cityname: String, time: String, weatherIcon: String, weatherdescription: String, temperature: Double, wind: String, humidity: Int, tempMin: Double, tempMax: Double, feelsLike: Double, rainfall: Double)], NetworkError>) -> Void) {
        // 위치데이터
        LocationManager.shared.setLocation(latitude: latitude, longitude: longitude)
        guard let currentLocation = LocationManager.shared.currentLocation else {
            return completion(.failure(.badLocation))
        }

        //API call
        guard let url = URL.urlForForecastForLocation(currentLocation, apiKey: apiKey) else {
            return completion(.failure(.badUrl))
        }

        //API call에서 데이터를 forecastData 배열에 넣기
        performRequestForecast(with: url) { result in
            switch result {
                //performRequestForecast매소드에서 let weatherData = try JSONDecoder().decode(WeatherData.self, from: data) 이 성공했을 때,
            case .success(let weatherData):
                // 날씨 데이터를 성공적으로 받아왔을 때
                let processor = WeatherDataProcessor()
                let forecastData = processor.process(weatherData: weatherData)
                completion(.success(forecastData))

            case .failure(let error):
                // 날씨 데이터를 받아오는데 실패했을 때
                completion(.failure(error))
            }
        }
    }
- 코드가 간결해지고, 가독성이 높아졌다.
3. ViewController에서 테스트한 모습
override func viewDidLoad() {
super.viewDidLoad()
view.backgroundColor = .white
setUI()
setAddSubView()
setLayout()
let latitude = 37.4536
let longitude = 126.7317
var forecastData: [(cityname: String, time: String, weatherIcon: String, weatherdescription: String, temperature: Double, wind: String, humidity: Int, tempMin: Double, tempMax: Double, feelsLike: Double, rainfall: Double)] = []
WeatherManager.shared.getForecastWeather(latitude: latitude, longitude: longitude) { result in
switch result {
case .success(let data):
forecastData = data
// forecastData 배열에 데이터가 들어갔는지 확인
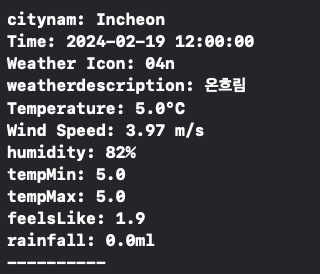
for forecast in forecastData {
let cityNameInKorean = NSLocalizedString(forecast.cityname, comment: "")
print("cityname: \(cityNameInKorean)")
print("Time: \(forecast.time)")
print("Weather Icon: \(forecast.weatherIcon)")
print("weatherdescription: \(forecast.weatherdescription)")
print("Temperature: \(forecast.temperature)°C")
print("Wind Speed: \(forecast.wind)")
print("humidity: \(forecast.humidity)%")
print("tempMin: \(forecast.tempMin)")
print("tempMax: \(forecast.tempMax)")
print("feelsLike: \(forecast.feelsLike)")
print("rainfall: \(forecast.rainfall)ml")
print("----------")
}
case .failure(let error):
print("Error: \(error)")
}
}
}
}- 콘솔창 출력 모습
'Xcode Study' 카테고리의 다른 글
| TIL 열심히 하자! (0) | 2024.02.20 |
|---|---|
| DTO(Data Tranfer Object)란? (0) | 2024.02.15 |
| 5일치 3시간 단위 날씨예보 배열에 넣기(with OpenWeatherMap) (1/2) (0) | 2024.02.13 |
| 3시간 단위 5일치 OpenWeatherMap API를 활용한 데이터 호출 (1) | 2024.02.13 |
| [trouble Shooting]지원하지 않는 5일 단위 OpenWeatherMap API call (0) | 2024.02.12 |
