
| 일 | 월 | 화 | 수 | 목 | 금 | 토 |
|---|---|---|---|---|---|---|
| 1 | 2 | 3 | 4 | 5 | ||
| 6 | 7 | 8 | 9 | 10 | 11 | 12 |
| 13 | 14 | 15 | 16 | 17 | 18 | 19 |
| 20 | 21 | 22 | 23 | 24 | 25 | 26 |
| 27 | 28 | 29 | 30 |
- SwiftUI Boolean 값
- 영문 개인정보처리방침
- font book
- Timer
- Protocol
- weatherKit
- weak var
- WeatherManager
- swift
- 러닝타이머
- 단일 책임원칙
- addannotation
- UIAlertAction
- RunningTimer
- xcode로 날씨앱 만들기
- CoreLocation
- App Store Connect
- 클로저의 캡슐화
- UICollectionViewFlowLayout
- AnyObject
- Required Reason API
- CLLocationManagerDelegate
- MKMapViewDelegate
- Xcode
- 한국어 개인정보처리방침
- 러닝기록앱
- MKMapItem
- Startign Assignments
- dispatchsource
- 서체관리자
- Today
- Total
VesselWheel
weatherKit을 활용한 러닝맵에 날씨정보 호출하기 본문
WWDC22에서 소개된 weatherKit을 활용해서 지도앱 위에 날씨정보를 사용자에게 노출하고자 한다.
러닝을 하기에 앞서, 가장 중요한 것이 날씨이다. 실내에서의 러닝은 트레드밀에서 하기 때문에, 날씨의 영향을 받지 않지만,
러너들에게 날씨는 러닝 복장, 페이스 그리고 러닝목표와 장소까지 날씨로 비롯된 고려해야할 요소가 크게 달라진다.
그렇기 때문에, 러닝맵에서 러닝기록에 이어서, 두번째로 중요한 것이 날씨정보이다.
https://developer.apple.com/videos/play/wwdc2022/10003/?time=268
Meet WeatherKit - WWDC22 - Videos - Apple Developer
WeatherKit offers valuable weather data for your apps and services to help people stay up to date on the latest conditions. Learn how to...
developer.apple.com
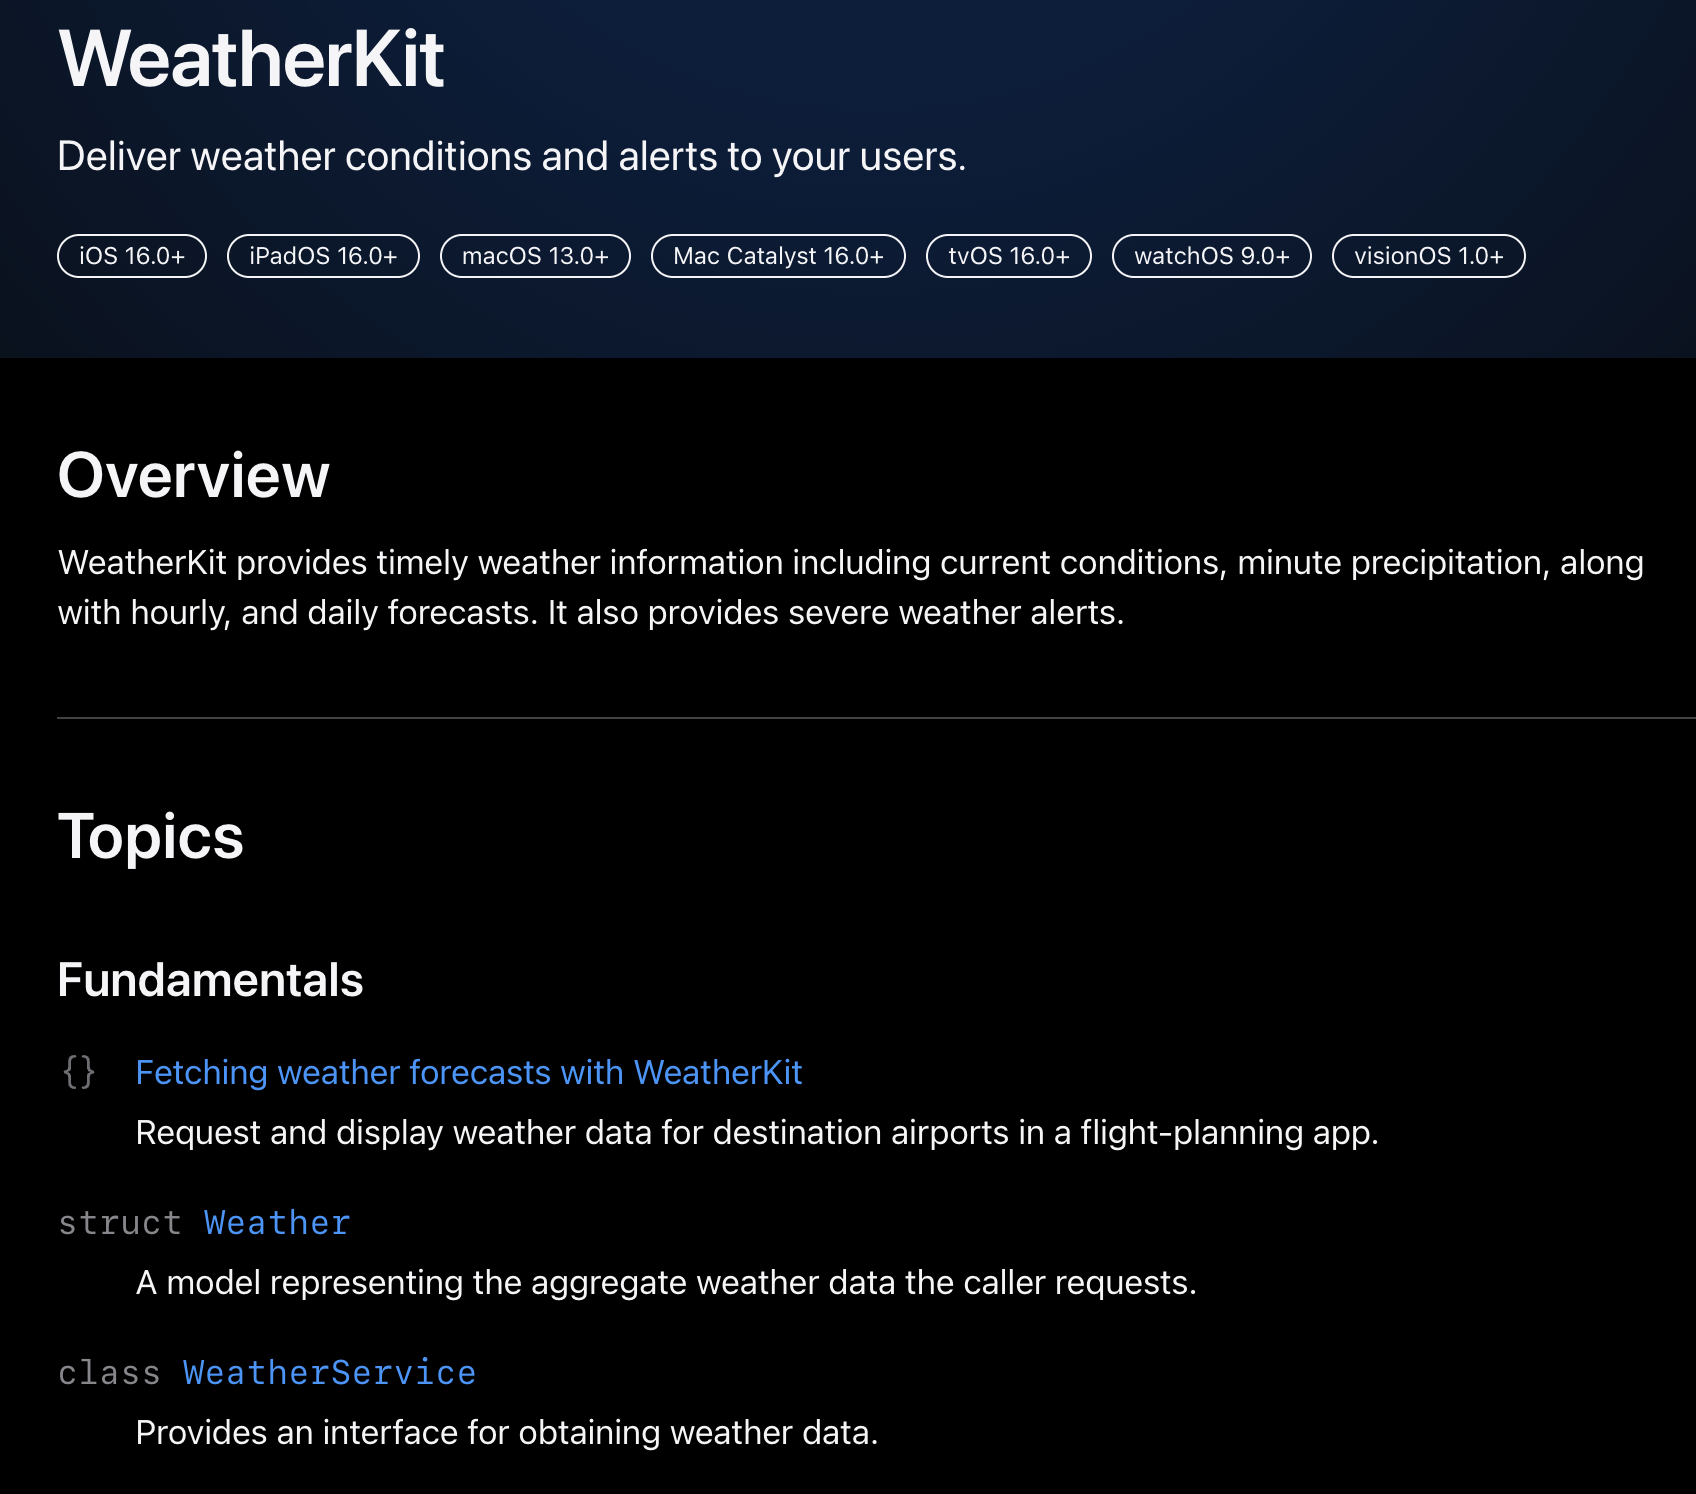
https://developer.apple.com/documentation/WeatherKit
WeatherKit | Apple Developer Documentation
Deliver weather conditions and alerts to your users.
developer.apple.com
weatherKit을 활용한 날씨정보 호출은 크게 2가지 방법이 있다. iOS 16 이상에서 지원하는 weatherService와
// Request the weather

import WeatherKit
import CoreLocation


let weatherService = WeatherService()

let syracuse = CLLocation(latitude: 43, longitude: -76)

let weather = try! await weatherService.weather(for: syracuse)

let temperature = weather.currentWeather.temperature

let uvIndex = weather.currentWeather.uvIndex
Request the weather via REST API
Meet WeatherKit - WWDC22 - Videos - Apple Developer
WeatherKit offers valuable weather data for your apps and services to help people stay up to date on the latest conditions. Learn how to...
developer.apple.com
그리고 REST API를 활용한 방법이 있다.
/* Request a token */
const tokenResponse = await fetch('https://example.com/token');
const token = await tokenResponse.text();
/* Get my weather object */
const url = "https://weatherkit.apple.com/1/weather/en-US/41.029/-74.642?dataSets=weatherAlerts&country=US"
const weatherResponse = await fetch(url, {
headers: {
"Authorization": token
}
});
const weather = await weatherResponse.json();
/* Check for active weather alerts */
const alerts = weather.weatherAlerts;
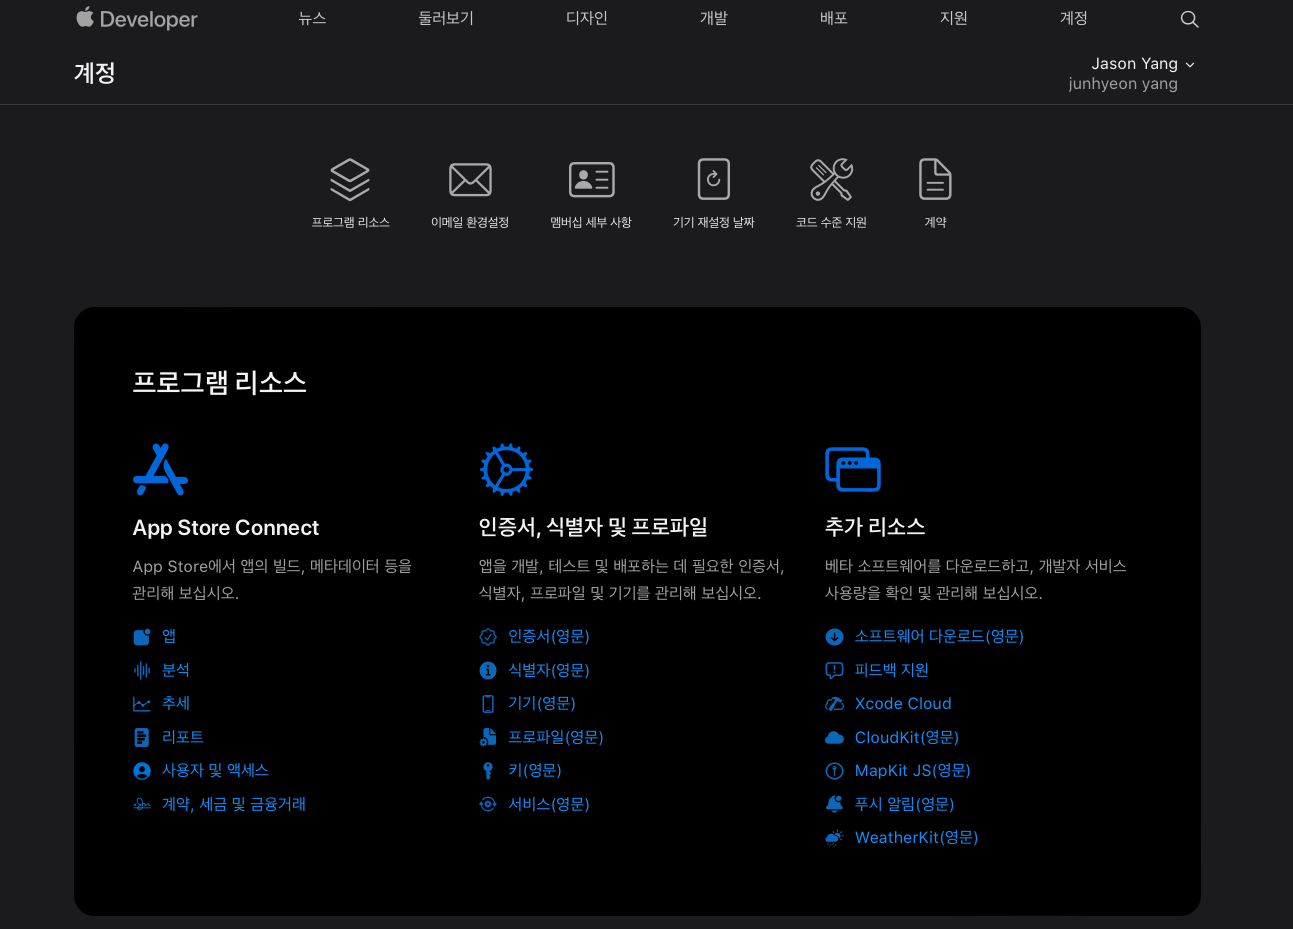
const detailsUrl = weather.weatherAlerts.detailsUrl;유료 개발자 구독을 시작하고나서, 앱 등록을 진행하게 되면, 화면 중앙의 인증서, 식별자 및 프로파일을 진행하게 된다.
자세한 방법은 다음 글 참고(-> https://vesselwheel.tistory.com/211)
1. Certificate 요청하기
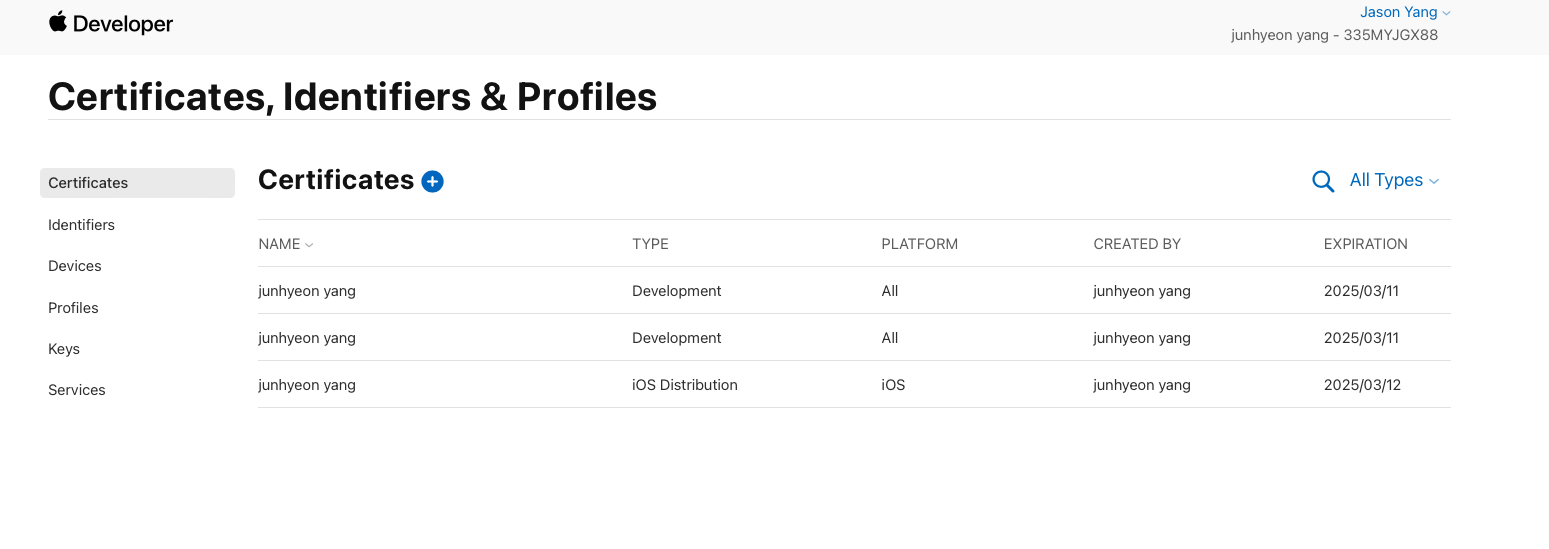
링크(https://developer.apple.com/account/resources/certificates/list) 접속
2. Identifier 만들기
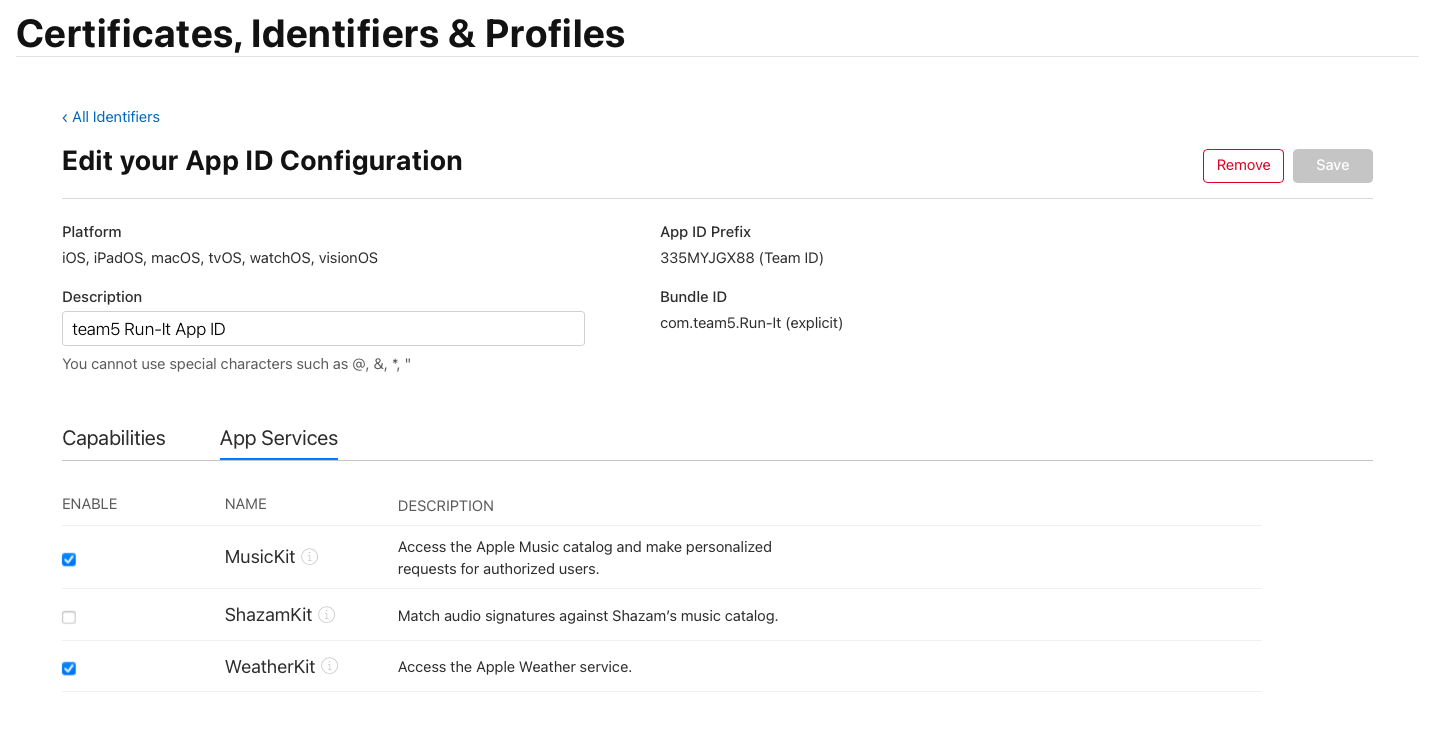
-> Identifier를 만들 때, xcode의 bundle ID와 동일하게 identifier를 등록하게 되는데,
이 때 Capabilities와 App Services에서 WeatherKit을 체크하고 저장해야한다.
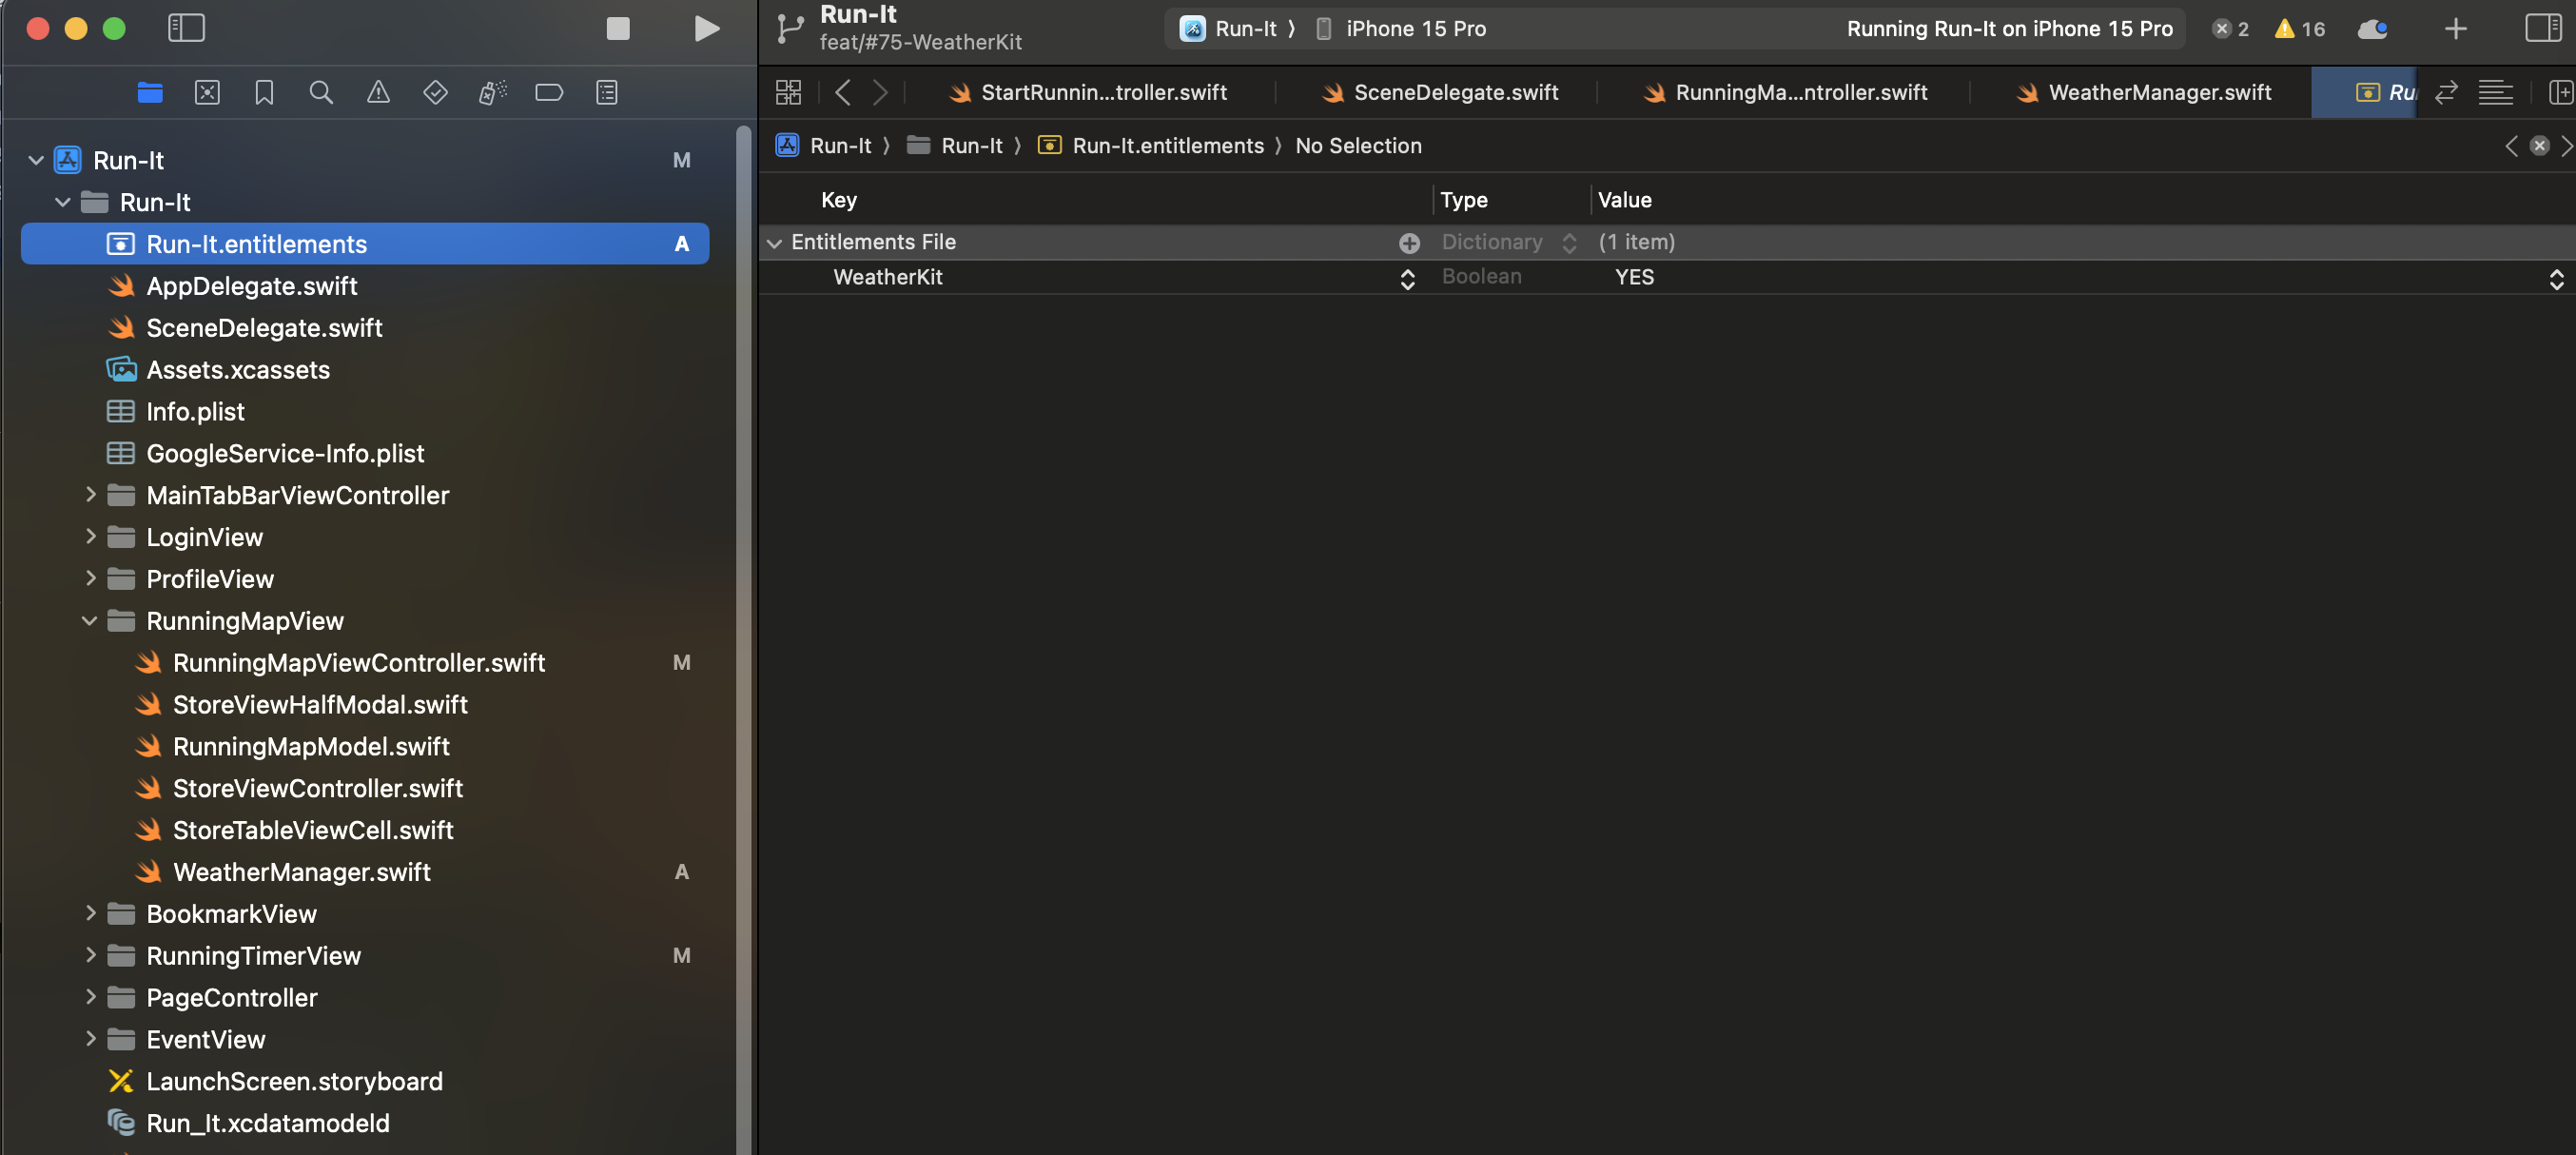
3. xcode 프로젝트에서는 App - Target + capability [weatherKit]을 등록한다.
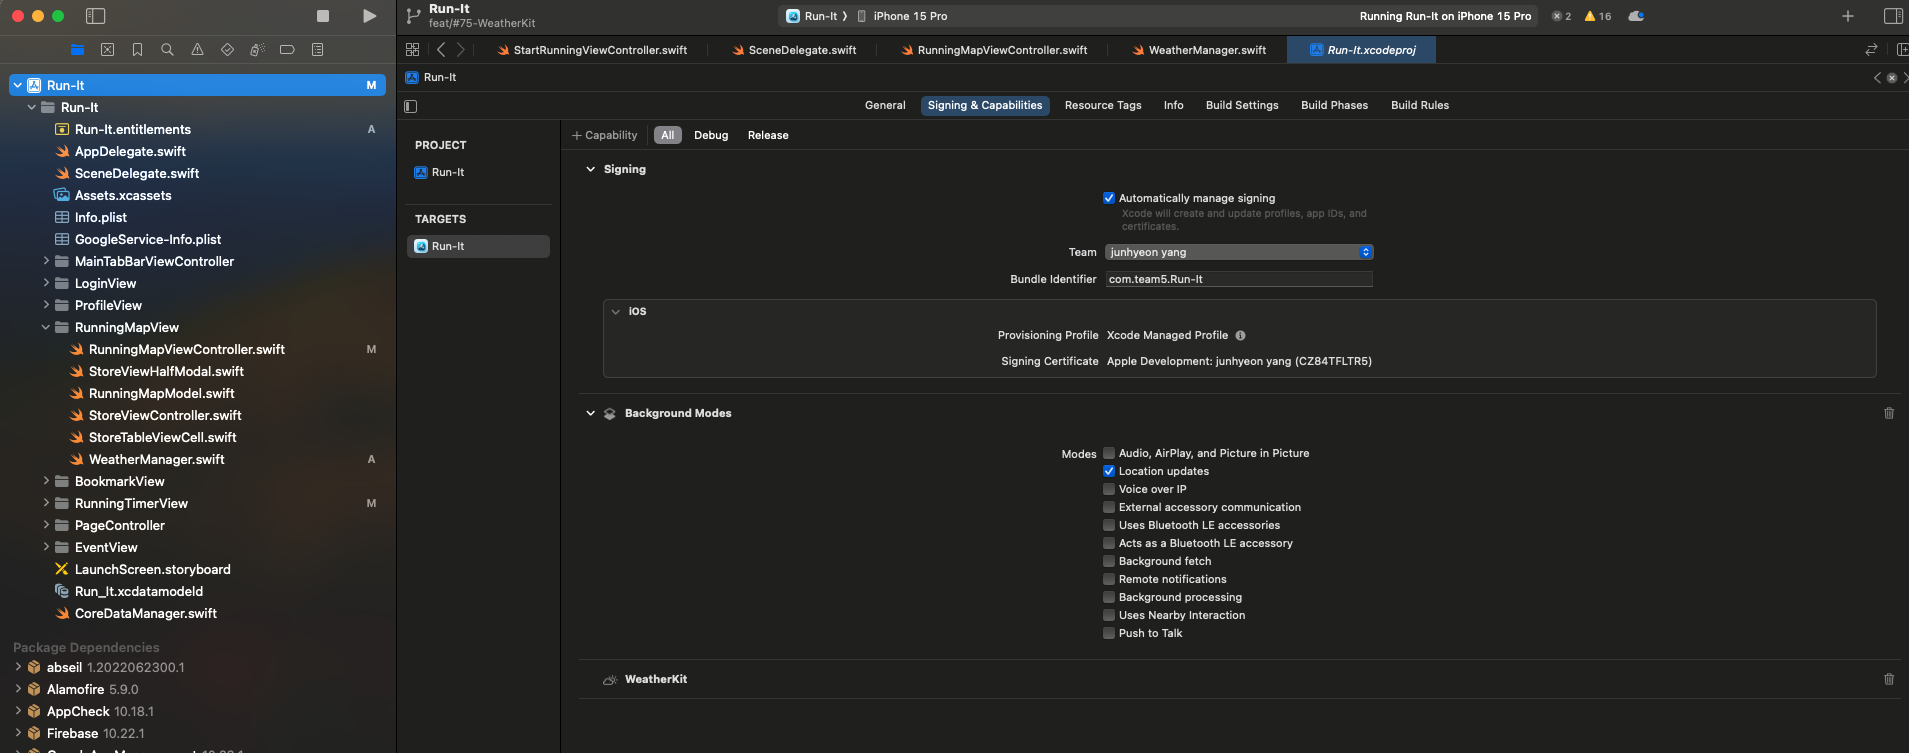
weatherKit을 등록하면, 아래의 스크린샷처럼 네이게이터 파일 목록에서 .entitlements를 통해 WeatherKit을 등록한 파일을 볼 수 있다.
코드 단에서는
1. 우선 위치기반 날씨를 호출하기 위해 import WeatherKit과 CoreLocation을 하고,
import Foundation
import WeatherKit
import CoreLocation
class WeatherData {
static var shared = WeatherData()
func getWeather(location: CLLocation) {
Task {
do {
// WeatherService 싱글턴 사용
let weather = try await WeatherService.shared.weather(for: location)
let currentTemperature = weather.currentWeather.temperature
let currenthumidity = weather.currentWeather.humidity
let hourlyForecast = weather.hourlyForecast
let wind = weather.currentWeather.wind
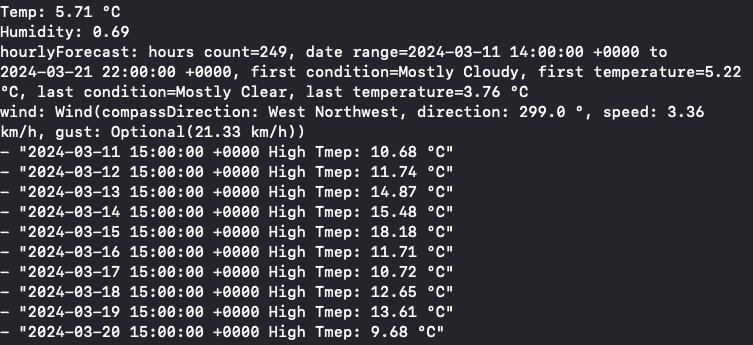
print("Temp: \(currentTemperature)")
print("Humidity: \(currenthumidity)")
print("hourlyForecast: \(hourlyForecast)")
print("wind: \(wind)")
weather.dailyForecast.forEach {
dump("\($0.date) High Tmep: \($0.highTemperature)") }
} catch {
print(String(describing: error))
}
}
}
func fetchWeather(location: CLLocation) async throws {
do {
let weather = try await WeatherService.shared.weather(for: location)
print("Temp: \(weather.currentWeather.temperature)")
print("Humidity: \(weather.currentWeather.humidity)")
weather.dailyForecast.forEach {
dump("\($0.date) High Tmep: \($0.highTemperature)") }
} catch {
print("Error: \(error)")
}
}
}WeatherKit에서 지원하는 WeatherService 파이널 클래스를 활용하여 애플 웨더킷 서버에서 날씨정보를 호출하게 된다.
위 코드에서는 Task에 등록하는 방법과 throws/await 의 방법으로 구현하였다.
(공식문서에서는 객체를 생성하는 방법으로 설명하고 있다. 저 공식문서를 보고 바로 적용할 수 없어서 여러 아티클, 블로그를 참고했다. )
Fetching weather forecasts with WeatherKit에 첨부된 예시 코드는 항공편과 각 공항의 날씨를 연계해서 설명하고 있다.
-> 공식문서의 Fundamentals의 Fetching weather forecasts with WeatherKit을 클릭하게 되면, 예시 코드를 받아볼 수 있었다.
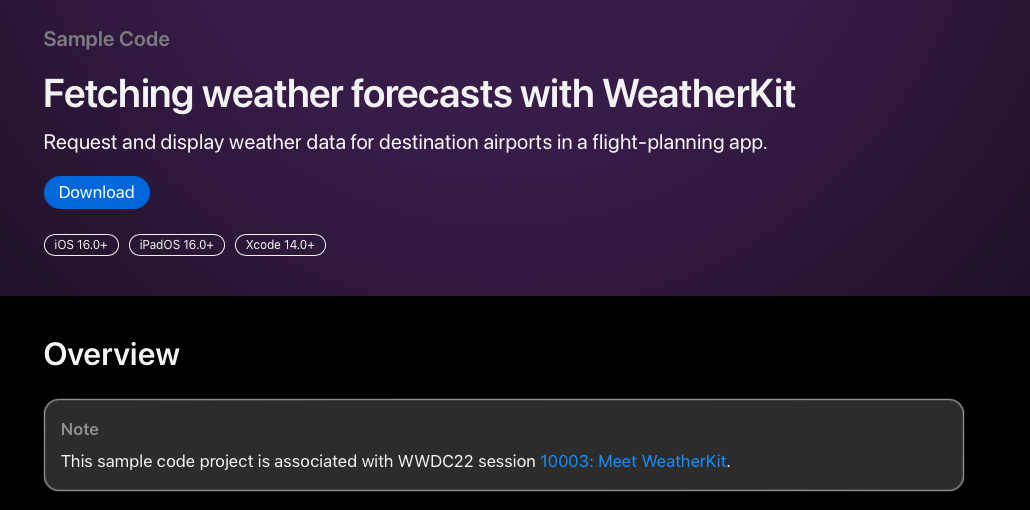
https://developer.apple.com/documentation/weatherkit/fetching_weather_forecasts_with_weatherkit
Fetching weather forecasts with WeatherKit | Apple Developer Documentation
Request and display weather data for destination airports in a flight-planning app.
developer.apple.com
하지만 이 공식문서를 읽고 답습하는 과정이 나에게는 쉽지 않았고, 내가 원하는 기능을 구현하는데 다소 시간이 걸렸다.
우선 View에 연결하지 않고, 싱글톤 패턴으로 getWeather 매소드를 호출하였다.
    @objc func currentLocationButtonAction() {
        //        RunningTimerLocationManager.shared.getLocationUsagePermission()  //viewDidLoad 되었을 때 권한요청을 할 것인지, 현재 위치를 눌렀을 때 권한요청을 할 것인지
        mapView.showsUserLocation = true
        mapView.setUserTrackingMode(.follow, animated: true)
        if let location = self.currentLocation {
            WeatherData.shared.getWeather(location: location)
        } else {
            print("현재 위치를 가져오는 데 실패했습니다.")
        }
        print("확인")
    }
'Xcode Study' 카테고리의 다른 글
| [Trobule Shooting] 러닝타이머 거리값이 pause 버튼을 누렀다가, 다시 재개를 누르면 계속 기록되지 않고 멈춤 (0) | 2024.03.15 |
|---|---|
| weatherKit을 활용한 러닝맵에 날씨정보 호출하기 Vol.2(with Combine, ViewModel) (0) | 2024.03.13 |
| Apple Developer 등록하기 및 협업하기 (0) | 2024.03.11 |
| MapKit에서 실시간 사용자 위치 추적 및 경로 표시하기 (1) | 2024.03.08 |
| MapKit으로 출발지, 도착지 그리고 경로 구현하기(.feat CLLocationManagerDelegate, MKMapViewDelegate) (0) | 2024.03.05 |


